How Do I Install Laminate Wood Flooring?
 For Sam's 26th birthday I squirreled away some money, took a 4 day weekend, and surprised her with new laminate wood floors. The bank-owned carpet and linoleum had seen a long full life and deserved retirement.My father and brother-in-law helped with the installation while I sent Sam to her mom's house with the kids.It was one of the longest weekends of our lives (and we only replaced the 500 square feet in the living room, kitchen, and hallway).**Husbands: don't surprise your wife with a big DIY project that takes all weekend and keeps you two apart ON HER BIRTHDAY.**
Here's my amateur guide to installing laminate wood flooring.

Step 1 - Research, Shop, Compare
Price goes up with the plank thickness and more popular colors and perceived widths. We compared the options available at Lumber Liquidators, Home Depot, and Lowe's finally deciding on this medium toned Fireside Oak laminate from Lowe's for $0.99/sq. ft. (Or $20/box).Buy the laminate a week or two before laying the floors as you'll need to let the wood acclimate to the room it'll be installed in. The box will have instructions for how long it'll take to acclimate - usually 3 or 4 days.Don't forget to budget for underlayment (that padding layer that goes between the new laminate and the concrete or wood sub-floor). The cheap stuff we used is $25/box (100 square feet) at Lowe's as of the writing of this post or you can find laminate underlayment
Step 2 - Demo, Remove, and Prep WELL Beforehand
I assumed it'd take my brother-in-law and me a simple 2 or 3 hours one evening to pull up the old carpet and scrape the old linoleum. 4 hours in on Thursday night we realized we were in over our heads. Pulling up the linoleum in the kitchen revealed a surprise layer of more linoleum, which we decided to leave in place. But the glue on top if it took forever to scrape out. (The linoleum we left in place was thin enough to not notice now that the floors are settled)The carpet came out quickly, but the tack strips and nails took very focused, slow attention to detail to make sure the whole floor was clear.Give yourself plenty of time for demo and prep. We ended up rushing to start laying and didn't spend anytime checking the concrete, sanding/filling low or high spots to make it level.The floors are down and we only barely notice a few spots that give. Those are even settling with time, but we could've spent a few hours leveling the concrete base.
Step 3 - Start Laying Your Laminate
When picking the direction of the boards, we decided to run the planks down the longest sight line: from our living room down the hallway towards the bedrooms.This helped us maintain the straightest true line possible and lengthened the feel of the house itself.We then started laying laminate out from that center line, first left, toward the back sliding door, then right, toward the kitchen. Once we got out in the open of the living room work sped up.Piecing the boards together involved lifting each new laminate board to a 2o degree angle, sliding it under the proceeding piece, and pushing the laminate flat until it snapped into place.A dozen pieces in we realized most of our boards weren't flush. We'd been tipping each peace up only maybe 5-10 degrees and not hearing that crucial click as the board would slip into place. The grooves are set to match perfectly and hold snug, but only if you follow the instructions!
Step 4 - Mind the Edges
If you're installing baseboard over the floors like we did, you'll leave an expansion gap between the end of each laminate board and the wall.This being my first attempt at laminate floor laying, I thought I knew better than the instructions and left gaps bigger than 3/8"... which made for a headache later when we started installing baseboards only to see gaps between the edge of the baseboard and the laminate.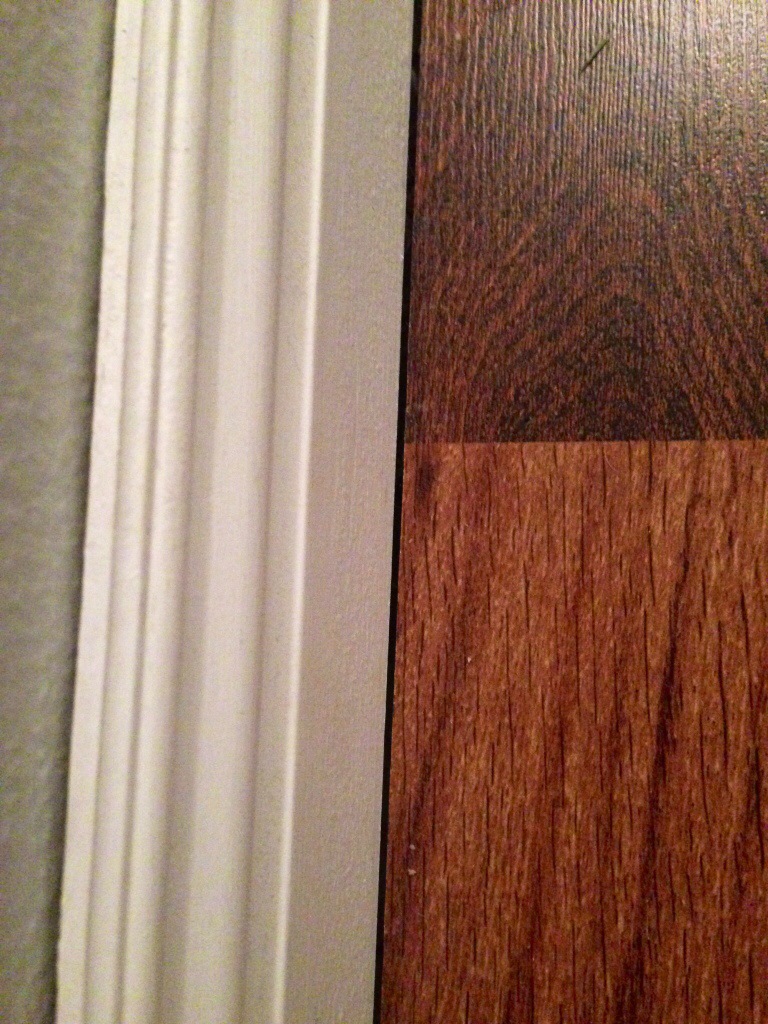 In my (weak) defense, I thought the 3/8" recommendation was a minimum gap, leaving room for the floors to expand in different temperatures and humidity. Turns out it was more of an exact requirement.I fixed the gaps by cutting tiny slivers of laminate to fit in just under the baseboards, pulled the baseboards back off, used wood glue to install the laminate slivers, and then finally re-installed the baseboards. All those tiny cuts cost us a lot of time.
Step 5 - The Flooring Finishing Touches
Our kitchen is set up with an entry door by the front door, and then a big opening out into the living room. In other words it makes for the perfect race track for our kids to run a loop around endlessly.This made for one of the trickiest parts of laying laminate - meeting in the middle as we rounded both sides. The floor actually gives a little so we were able to line it up perfectly. If you run into the same situation, don't be afraid to pull the boards a bit. The tiny gaps, or slight misalignment will disappear as you lay more laminate.We also laid the laminate all the way under the appliances (fridge, range, and dishwasher) and into the pantry. These narrow paths meant lots of cuts and slow work, but left the space feeling complete.So, that's what I learned my first time laying laminate wood floors! Hope it helped. Have you laid flooring before? Any tips or steps to add? (Visual test of the new laminate and baseboards. Good before vs after comparison to the old carpet.)